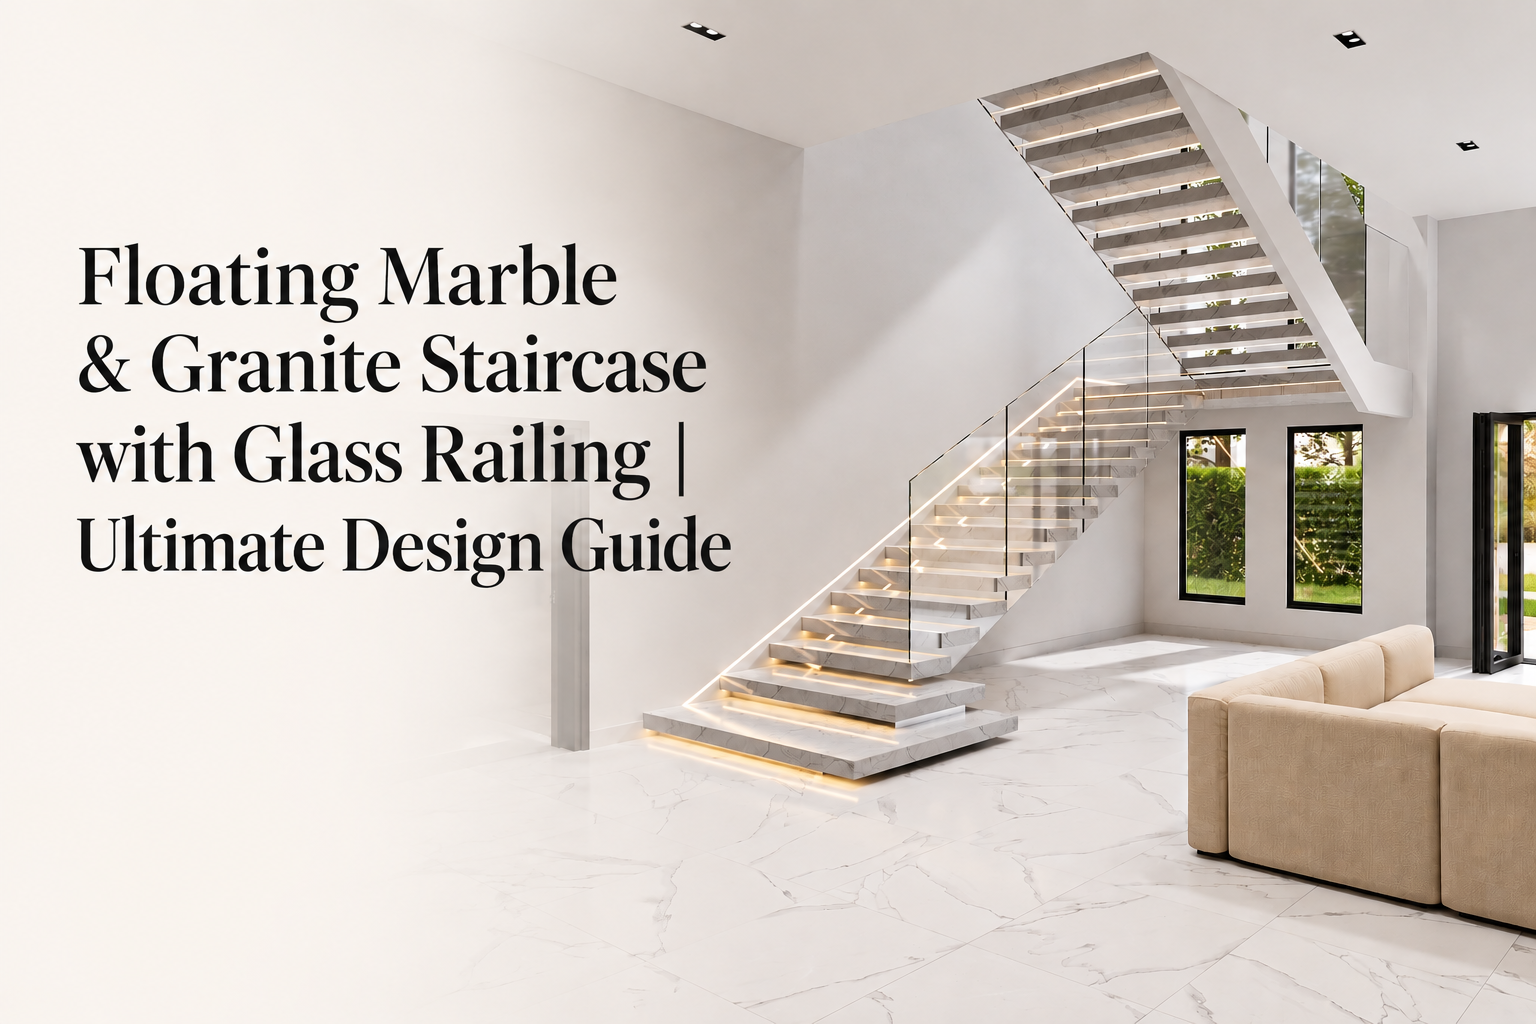
A floating staircase clad in natural stone and paired with a minimalist glass railing. It’s the holy grail of modern home design—an architectural sculpture that appears to defy gravity. The combination of weighty marble or granite with transparent glass creates a breathtaking visual tension, making the staircase feel simultaneously grounded and impossibly light.
But achieving that effortless look demands serious structural engineering, meticulous stone selection, and precision installation. In this guide, we’ll walk through everything you need to know—from choosing between marble and granite, to engineering the cantilever, to integrating that sleek glass railing.
Why This Design Combination Works
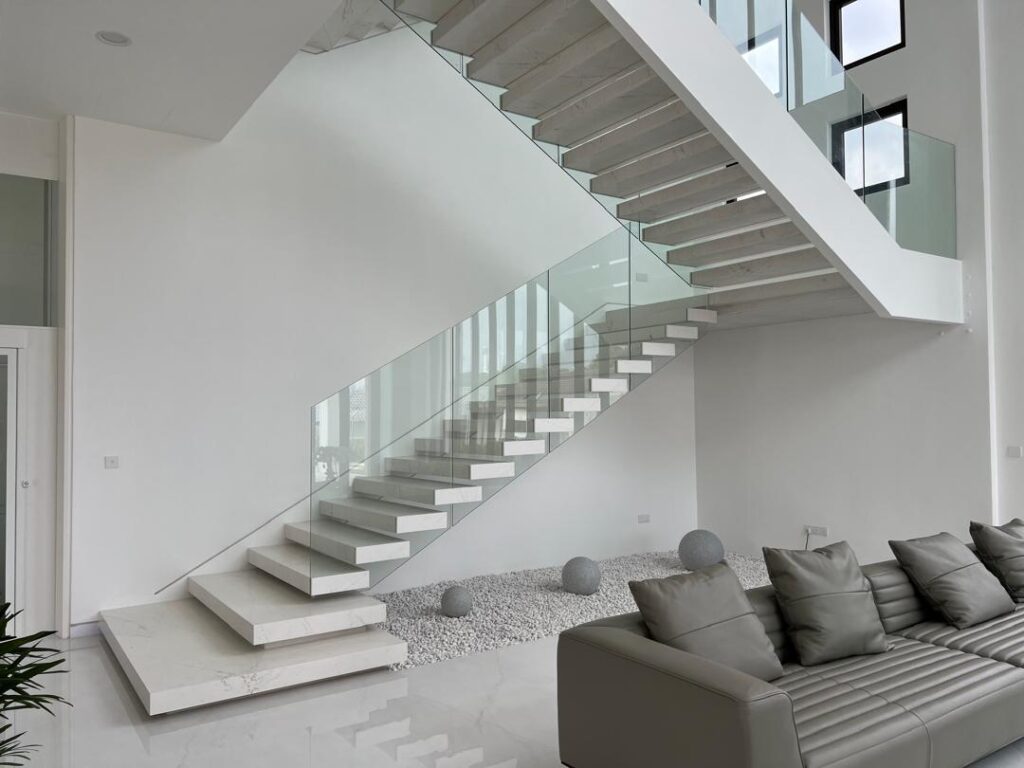
The appeal is simple: contrast. The solid, veined mass of a natural stone tread appears to hover in space—a feat achieved by cantilevering each step from a hidden structural wall or steel spine. Pair this with a frameless glass balustrade mounted to the side, and you maximize the visual openness. The railing provides safety without blocking sightlines, allowing the stone treads to remain the undisputed star of the show. Adding subtle LED lighting beneath each tread amplifies the floating illusion after dark.
Whether your style is ultra-modern, transitional, or even warm-industrial, a floating marble or granite staircase with a side glass railing can serve as a dramatic centerpiece that transforms how an entire home feels.
Marble vs. Granite: Choosing the Right Stone for Your Stairs
Before you even think about installation, you need to select the right material. Both marble and granite are viable, but their properties differ significantly.
Aesthetics
Marble offers an unmatched elegance with its flowing veins, soft patterns, and luminous quality. It’s a showstopper, especially when honed or leathered to reduce slipperiness. It brings a sense of luxury and timelessness that few other materials can match.
Granite provides a more consistent, speckled appearance and comes in a vast range of colors. Its visual feel is often described as strong, solid, and grounded—ideal if you want the stone to convey permanence and strength rather than delicate beauty.
Durability and Hardness
This is where granite pulls ahead. Granite is exceptionally hard and resistant to scratches, heat, and general wear—making it a better fit for high-traffic staircases and homes with kids or pets. Its interlocking crystalline structure, formed under immense heat and pressure, is what gives it such remarkable scratch resistance.
Marble, by contrast, is softer and more porous. It can scratch and etch when exposed to acidic substances like wine, citrus, or even some household cleaners. It’s best reserved for low-to-medium-traffic interior stairs where its beauty can be diligently protected.
Maintenance
Marble requires more care: regular sealing to prevent staining, immediate cleanup of spills, and strict use of pH-neutral cleaners. Granite is more forgiving—it’s less porous, needs less frequent sealing, and withstands everyday wear with less drama. If you prefer a stone that looks great with minimal fuss, granite is usually the smarter pick.
| Property | Marble | Granite |
| Pros | Classic luxury look; cool surface | Very hard and durable; scratch and heat resistant |
| Cons | Softer; scratches/etches with acids; porous (stains if unsealed) | Harder to cut/polish; can be pricey (rare types) |
| Density | ~2500 kg/m³ | ~2700 kg/m³ |
| Weight (@30 mm) | ~75–78 kg/m² | ~80–81 kg/m² |
| Thicknesses | 20–40 mm typical | 20–40 mm typical |
| Maintenance | Requires sealing (pore sealer); polish/acid cleaner | Lower porosity; periodic sealing advisable |
| Slip Resistance | Polished marble can be very slippery (low PTV); better if honed or treated | Polished granite still slick (moderate PTV); textured or flamed surfaces available |
| Heat/UV | Prone to thermal shock on very hot items | More heat-resistant |
Quick verdict: Choose marble if you prioritize timeless elegance and are prepared for a bit of upkeep. Choose granite if you value durability and worry less about daily wear and tear.
The Engineering Reality: How a Floating Stone Staircase Actually Stands Up
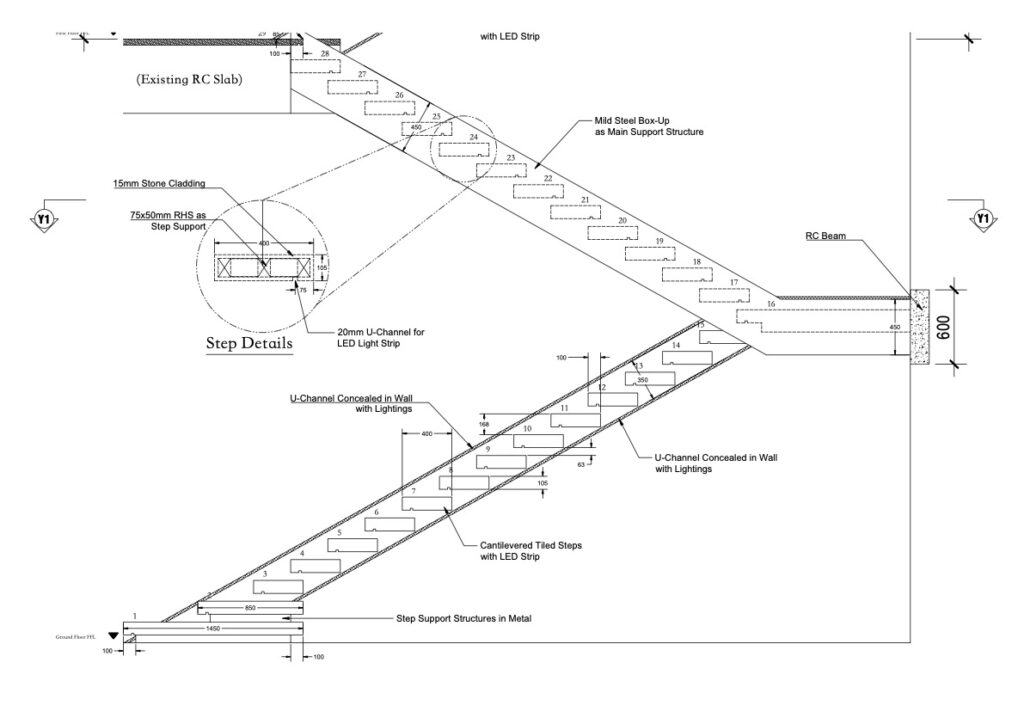
A floating staircase creates the illusion that each heavy stone tread is levitating. The secret lies in the hidden support system. Typically, each tread is anchored from one side into a reinforced structural wall—often concrete or a heavy steel frame. The load of the tread and anyone standing on it is transferred horizontally into that wall through cantilever mechanics.
Because stone is strong in compression but brittle in tension, it can’t simply be bolted at one end and left unsupported. Stone treads must be internally reinforced—often with embedded stainless steel rods—or laminated with engineered cores. The wall itself must be robust enough to handle the cumulative load of every tread plus dynamic forces from people walking, and it must be built with tight tolerances to accept mechanical fasteners or resin-anchored pins.
Some systems use a central steel mono-stringer hidden beneath the treads, while others employ post-tensioned steel cables running through pre-drilled holes in the stone blocks, pulling them into compression for maximum stability.
Load requirements are non-negotiable: a well-designed floating staircase must support 300 to 500 pounds per tread at minimum, which is a standard building code requirement. This capacity is verified by a structural engineer based on actual spans, materials, and connection details.
For stone treads, a minimum finished thickness of around 5 cm (about 2 inches) is typical for the stone cladding layer, though the total tread assembly—including the structural core, mortar, and stone—often reaches 70–80 mm (about 3 inches) or more for visual balance and physical strength. Some specifications require a minimum tread thickness of 100 mm (4 inches)regardless of material for durability and safety.
Bottom line: This is not a DIY project. You need a qualified structural engineer, an experienced stone fabricator, and a contractor familiar with cantilevered stair installations.
Step-by-Step Installation Overview
1. Planning and Engineering First
Long before any stone is cut or glass ordered, the team must coordinate around the structural support. Whether using a cantilevered wall system or a mono-stringer beam, the support is installed during the framing stage and must be perfectly level, plumb, and positioned to receive each tread individually. The glass railing’s mounting points should be planned at this stage as well to avoid conflicts later. Like any successful complex build, early coordination between structure, fabrication, finishes, and railings is what separates a smooth project from a costly disaster.
2. Substrate and Base Preparation
If stone is being adhered to a steel tread frame, the base must be smooth and rigid. One recommended method is to create a steel base plate with a layer of flame-retardant board or plywood fixed to it. This provides an ideal bonding surface for stone adhesives. Avoid using thick cement mortar beds directly on steel, as movement or vibration can cause cracking over time.
3. Stone Tread Installation
Stone treads are either mechanically anchored (using hidden brackets and pins) or adhered with high-strength epoxy. Each tread must be set perfectly level and aligned with its neighbors—even a slight deviation compromises both safety and aesthetics. For a true floating look, a small gap (roughly 3½ inches) is often maintained between the tread edge and the adjacent wall.
4. Glass Railing Installation (Side-Mounted)
Once the treads are secured, the glass railing is installed. For a side-mounted system—which preserves the floating aesthetic by avoiding top-mounted posts—the most common method uses glass standoffs: heavy-duty stainless steel pins bolted horizontally into the side of the stair stringer or support wall. The glass panels, pre-drilled at the factory with precise hole locations, are clamped between these standoffs, creating a frameless “floating glass” effect.
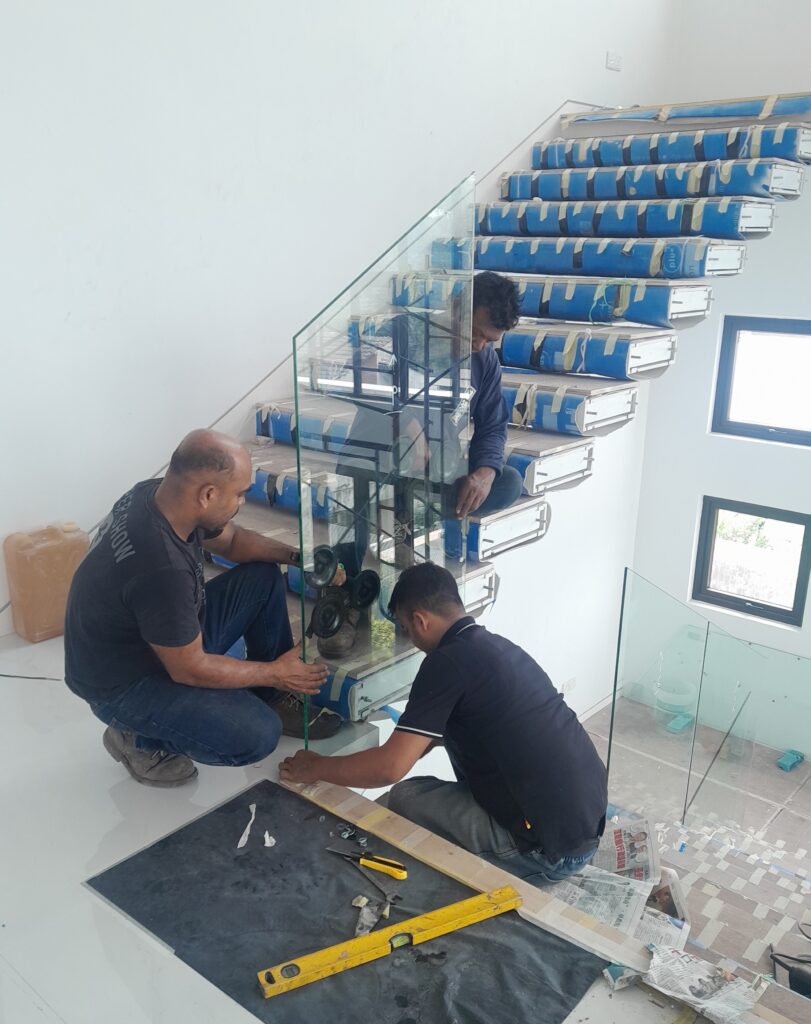
Critical installation rules include:
- Layout: Standoffs are typically arranged in two rows (one near the top of the glass, one near the bottom) with 100–200 mm vertical spacing and no more than 1200 mm between columns horizontally. On stairs, they’re often aligned with each tread to follow the stair geometry.
- Anchor depth: When mounting to wood, you need a solid 3–4 inches of structural backing behind the fascia. When mounting to concrete, maintain at least 70–80 mm from the slab edge to prevent blowout.
- Pre-drilled glass: Because tempered glass cannot be drilled on-site, all hole locations must be finalized and sent to the glass fabricator before tempering—zero margin for error.
Code Compliance and Safety
Floating staircases and glass railings are subject to stringent building codes. Key requirements include:
- Tread load: Each tread must support a minimum of 300 lbs live load.
- Tread depth: Minimum tread depth is typically 11.25 inches, with maximums around 13 inches for cantilevered designs.
- Riser height and uniformity: Riser heights must be consistent to prevent tripping; typically between 4 and 7.5 inches.
- Guardrail height: Glass railings must meet minimum height requirements (typically 36–42 inches depending on jurisdiction).
- Glass safety: Panels must be tempered or laminated safety glass. Some codes require a continuous top rail for railings over a certain height.
- Handrail integration: Some jurisdictions require a graspable handrail in addition to the glass panel; others allow the glass edge to serve as the handrail if it meets specific profile requirements.
Always consult local building codes early in the design process—retrofitting for code compliance after installation is extremely expensive.
Lighting: The Secret Ingredient
Lighting transforms a beautiful staircase into a spectacular one. The most effective approach is to recess LED strip channels into the underside of each stone tread, creating a soft glow that makes the steps appear to float on light. Single-color (typically warm white, around 2700K–3000K) is the cleanest choice for stair applications, offering a timeless look without visual clutter.
Other popular options include recessed wall-grazing lights to emphasize the stone’s texture, or handrail-integrated LED strips that provide subtle wayfinding illumination. When integrating lighting, ensure all wiring is planned during the structural phase—routes must be concealed within the wall or steel support frame, and low-voltage systems must comply with NEC and local electrical codes.
Long-Term Maintenance and Care
Natural stone is an investment, and proper care keeps it looking its best for decades.
- Daily cleaning: Use a pH-neutral, stone-safe cleaner and a soft microfiber cloth. Never use vinegar, bleach, ammonia, or abrasive scrubbers—these can etch marble and dull granite finishes.
- Spill management: Wipe up spills immediately, especially from wine, coffee, citrus, or oil, which can stain porous stone.
- Sealing: Marble should be resealed every 6–12 months depending on usage; granite can typically go longer between applications. Test sealer performance by sprinkling water on the surface—if it no longer beads up, it’s time to reseal.
- Scratch prevention: Avoid dragging heavy items across treads, and use felt pads under furniture placed near the staircase.
- Professional restoration: If etching, deep staining, or cracking occurs, consult a stone restoration professional rather than attempting DIY repairs with household products—these often make the problem worse.
Glass railings require minimal upkeep: regular cleaning with a streak-free glass cleaner and periodic inspection of standoff hardware to ensure all fasteners remain tight.
Final Thoughts
Installing marble or granite on a floating staircase with a side glass railing is an ambitious project that rewards you with one of the most stunning architectural features a home can have. It’s a junction where structural engineering, material science, and pure design artistry converge.
The keys to success are simple: engage experienced professionals early (structural engineer, stone fabricator, glass railing specialist), select your stone based on both beauty and practical durability, and never cut corners on the hidden structure that makes the magic possible.
Done right, your floating stone staircase won’t just connect two floors—it’ll be the feature everyone remembers, and the one you’ll enjoy every single day.